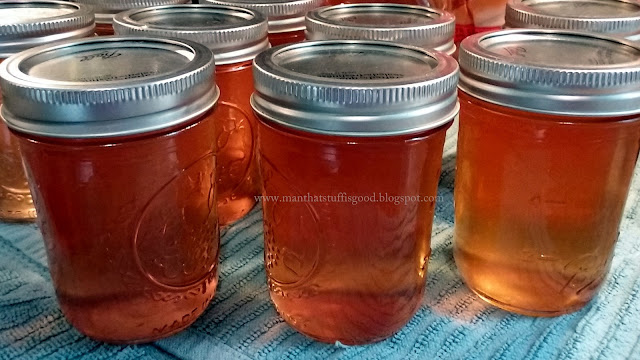
Apple Jelly Made With Peelings and Cores
If you're worried about the ugly spots, please read "Unconventional Stories From A Young Apple Farmer" blog to reassure yourself. I have canned these apples numerous times, made apple butter in the crock pot and have loved the results. Yes, it's easier to buy a jar from the store, but I know what I am serving (and not serving) and the taste is better in my humble opinion.
A few years ago my friend Claudia told me about this handy contraption she found that peeled, cored and sliced apples. It was inexpensive, but not cheaply made. Yesterday I went through about 70 apples for canning and I got them processed pretty quickly. I didn't keep track of how many apples I used for the apple butter the previous day but I did remember what my friend asked me when I made apple butter last year. "What did you do with your peels and cores?" Uhhhh. Threw them away?? She let me know I made a big mistake! "You could have made apple jelly!"
You don't have to tell this girl something like that twice. Claudia adds a lot more spices to her jelly but I make apple butter so I went with the plain ol' Sure-Jell recipe after I (to quote her), "cooked the crap out of the cores and peels."
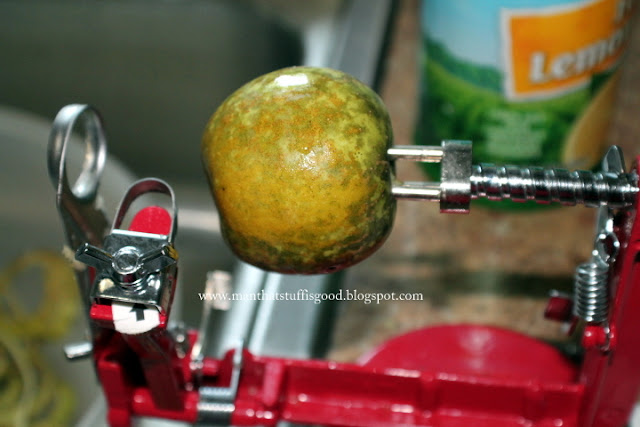
I had to share the process of using my toy to make the peeling job easier. Anyone who has used a hand peeler to prepare fruit for canning can relate. Just suction this to your counter---preferably near your sink.
Be sure to remove the stems from the apples. And here we go!!
Notice all the little adjustments on this baby. You can take off less apple or more. Due to the odd shapes I was encountering with these "farm fresh" apples, I found a happy medium so my apple butter didn't have peels and I had enough fruit to make a rich apple juice.
Seriously, I called my friend and went on about how much I loved this.
Now how cute is this? Pull the apple rings off and remove the core from the prongs. I had the peels falling in a bowl in the sink.
I stirred in a little lemon juice while I was peeling, but they still turned a little. Put the peelings and cores in a large pot; cover them with water and set the temperature to medium high.
I kept the lid on the pot while they were cooking. I needed 7 cups of juice to make 12 jelly jars.
This is what I ended up with after letting them cook for about three hours.
After straining the cores and peels, I ended up with 12 cups of juice.
Because jam and jelly making is such a quick process, I don't always have step-by-step pictures for each variety. But you can click through each flavor listed and see all of them. The instructions are broke down for using the Sure-Jell pectin. In my opinion, the instruction brochure layout needs to be revised to make sense. By that I mean the directions are not on the same side of the sheet. They did this on the reduced sugar brochure and I love it! I have always had success using Sure-Jell and when it comes to canning, I'm looking for easy, safe and consistent results. Who wants to spend a lot of time and have poor results?
I cannot stress enough how careful you need to be. The mixture will be very hot and you are dealing with boiling water. Be sure you don't have any kiddos underfoot when you are doing this.
DIRECTIONS ONCE YOU HAVE THE JUICE NEEDED:
I cannot stress enough how careful you need to be. The mixture will be very hot and you are dealing with boiling water. Be sure you don't have any kiddos underfoot when you are doing this.
DIRECTIONS ONCE YOU HAVE THE JUICE NEEDED:
 Get out your canning tongs to pull the jars from the pot; canning funnel and the magnetized tool to pull your lids and rings from the hot water and a clean cloth to wipe the jars down prior to sealing them.
I set my canner on the stove and set the rack in the pot raised for easy access and fill with water so that when the jars/rack are submerged, the jars will have one to two inches of water above them. (You can always add more boiling water if needed) I put the lid on the pot and turn the heat on high.
- Measure out with a liquid measuring cup (not dry), seven cups of apple juice.
- In a small bowl, measure nine cups of sugar (regular, not artificial) and set to the side.
- In a large pot add the juice and and bring to a boil.
- Stir in one box of Sure-Jell. Stir constantly. Add 1/2 teaspoon of butter to reduce foaming. Bring this mixture to a boil.
- Add in the sugar. Bring it back to a full boil and let it cook for 1 minute. Remove from heat.
- Remove any foam with a spoon. This will be very hot! Put the excess foam in one of your used bowls to discard later.
- Using a ladle, pour up the mixture into the jars through your canning funnel and leave 1/4" head space. Wipe the jar top and sides before placing a lid and ring on them.
- Space the filled jars around the raised up rack. When all jars are filled, carefully lower the rack into the water. Add additional boiling water, if needed, so that the jars are adequately covered. Put the lid back on the pot, bring to a boil and process for 5 minutes. (Jelly is 5 minutes, Jam is 10 minutes)
When that time is up, turn off heat and carefully remove the pot from the stove eye. When removing the lid (with a pot holder), be careful of the steam that will be released!! I remove my lid with it pointed away from my face. - Fold up a towel on your counter.
- With my canning tongs, I carefully move my jars to the towel to cool. If any of the jars didn't seal, be sure to refrigerate and consume first. If you don't hear equal "pings" for the quantity of jars processed and the lid springs back when you poke the middle of the jar, it didn't seal correctly. 24 hours later, I move them to the box my jars came in, mark the date on them and store them.


Comments
Post a Comment